
⛪ Product guide
Send a Christian wedding invitation your guests can bless back
A full wedding site rather than a card: the invitation, your story, every function with its own timings and venue, a gallery, and a Blessings page where guests write to you — by voice if they want. The builder will also read a photograph of your printed invitation and fill itself in from it.
Watch
The whole build, end to end
This recording has no voiceover — every action is labelled on screen as it happens. Click a chapter to jump the video there. To read that step instead, use the ↓ beside it — the written walkthrough is below.
Step by step
The written walkthrough
Everything the video covers, in a form you can search, scan and keep open in another tab.
Open the builder
The door is Edit Invitation, at the foot of the guest rail on desktop — not a Create button in a top bar. On a phone it is Create instead.
Step 1.1
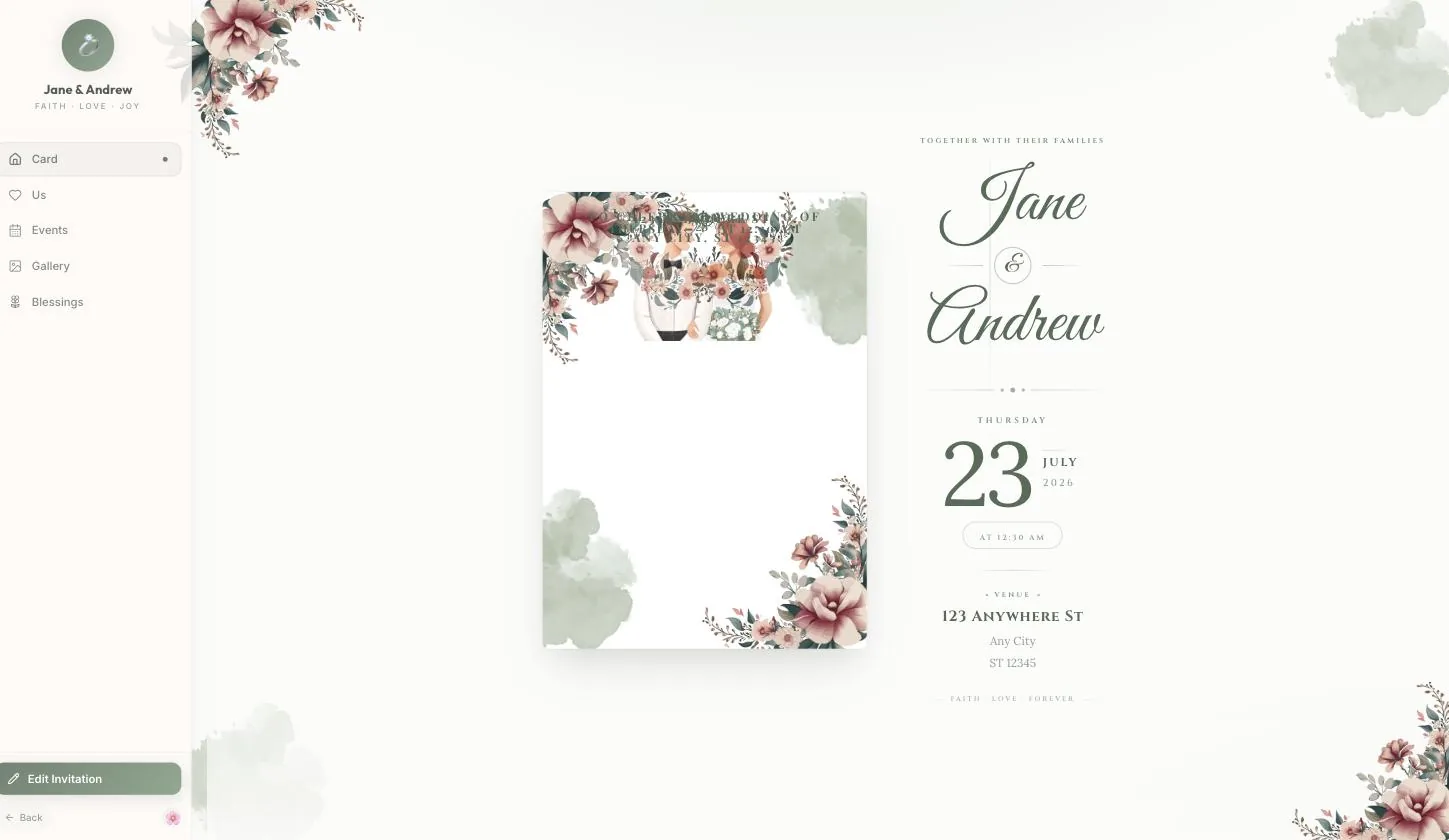
Press Edit Invitation
What you are looking at before you press it is the demo — Jane & Andrew, already filled in. Nothing is yours until you save.
Step 1.2
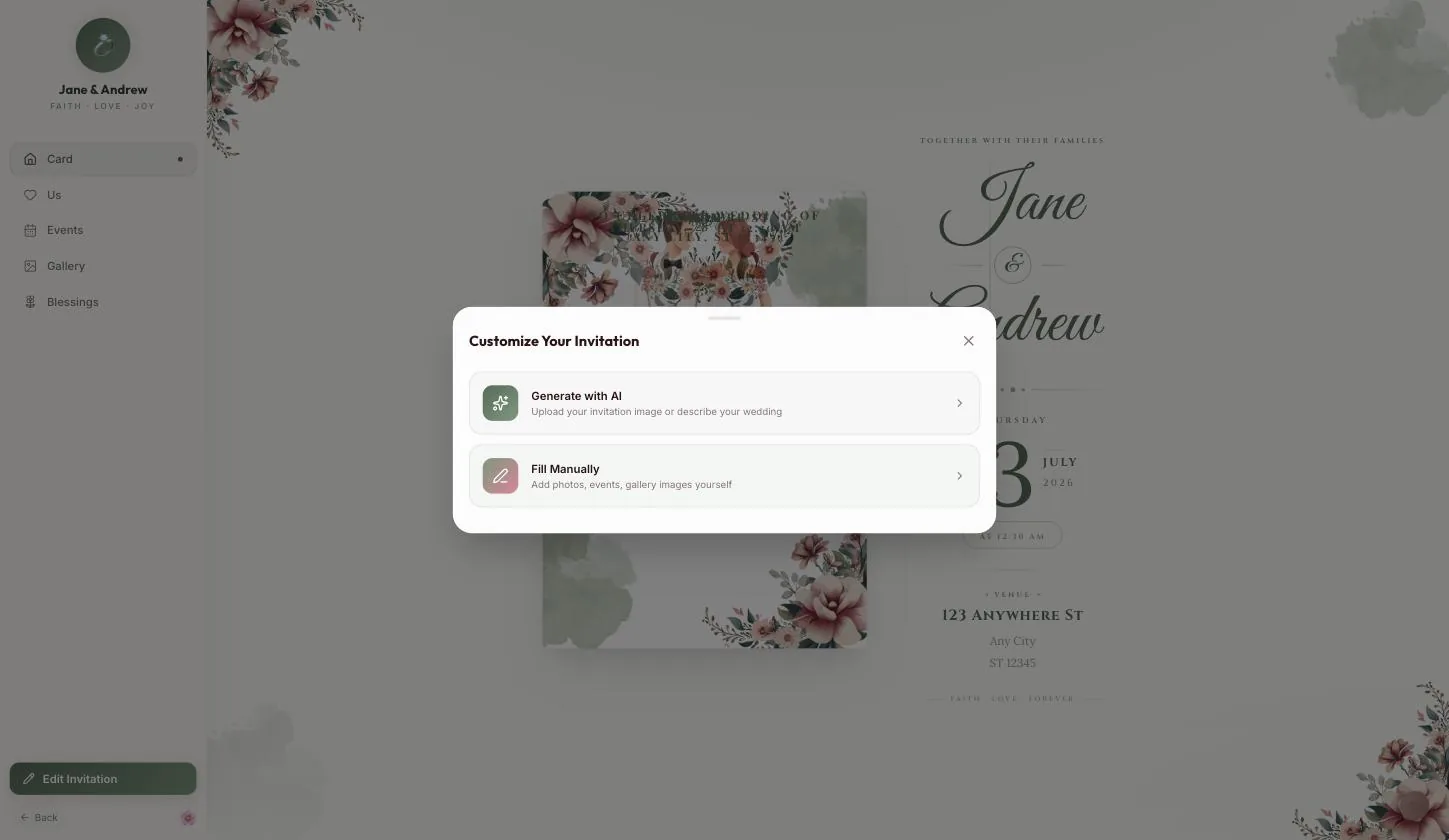
Generate with AI will read your paper card
The AI door here is not the usual “describe it and I'll write it”. It says “Upload your invitation image or describe your wedding” — photograph the card the printer gave you and it fills the whole builder from it.
This is the fastest route by a distance if the wedding is already designed on paper, and it is the least obvious thing in the template. Check every field afterwards — a photograph of a card is not a database record.
Step 1.3
Or Fill Manually, and use Continue
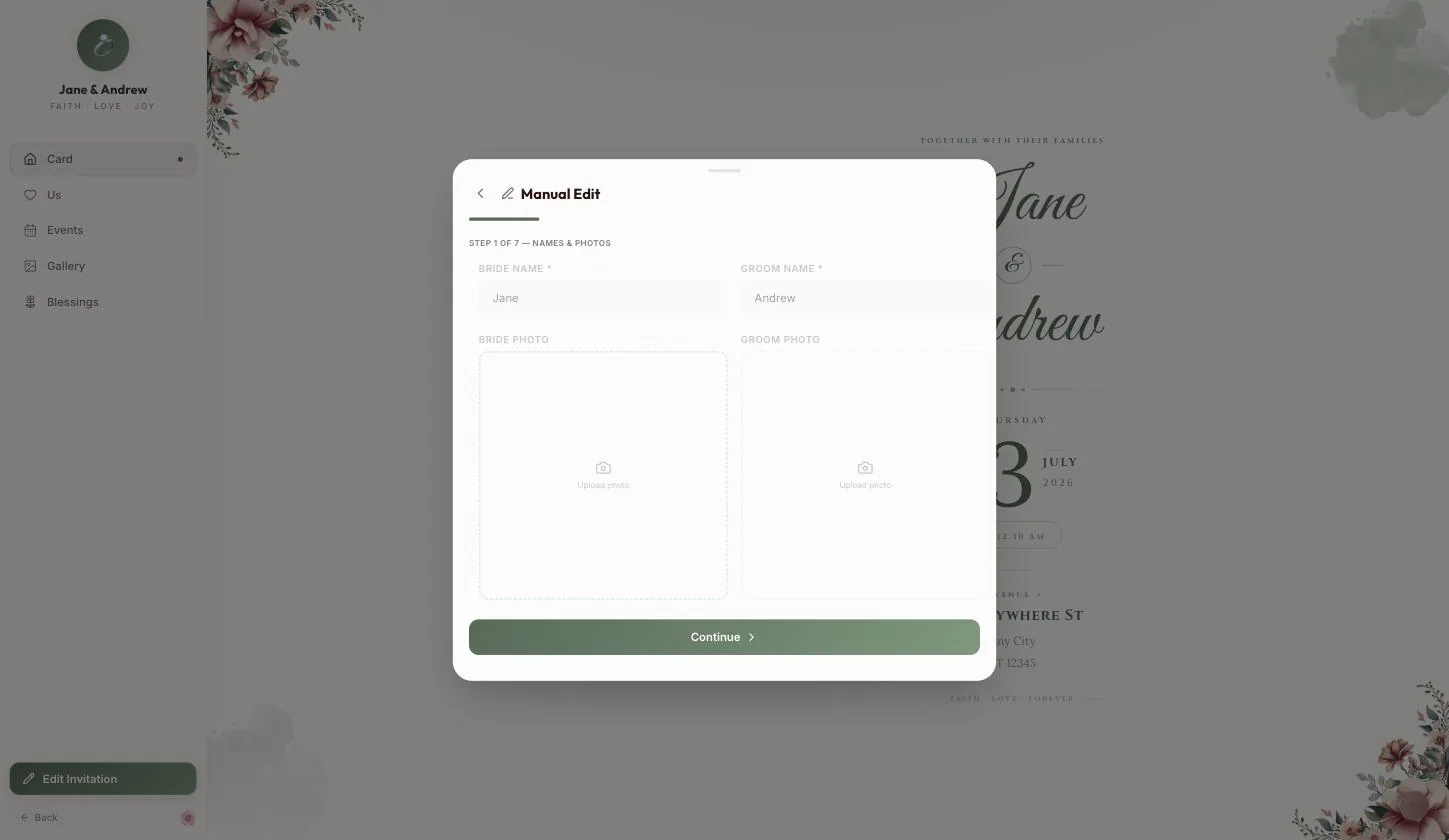
Seven pages, and the forward button says Continue rather than Next. The progress bar above the heading fills a segment per page.
Step 1 — names and photos
Step 2.1
Bride and groom, and a portrait each
Both names are required; the two photos are not. They become the header of the whole site and the two cards in the Us section.
Step 2 — date, venue, blessing, families
Step 3.1
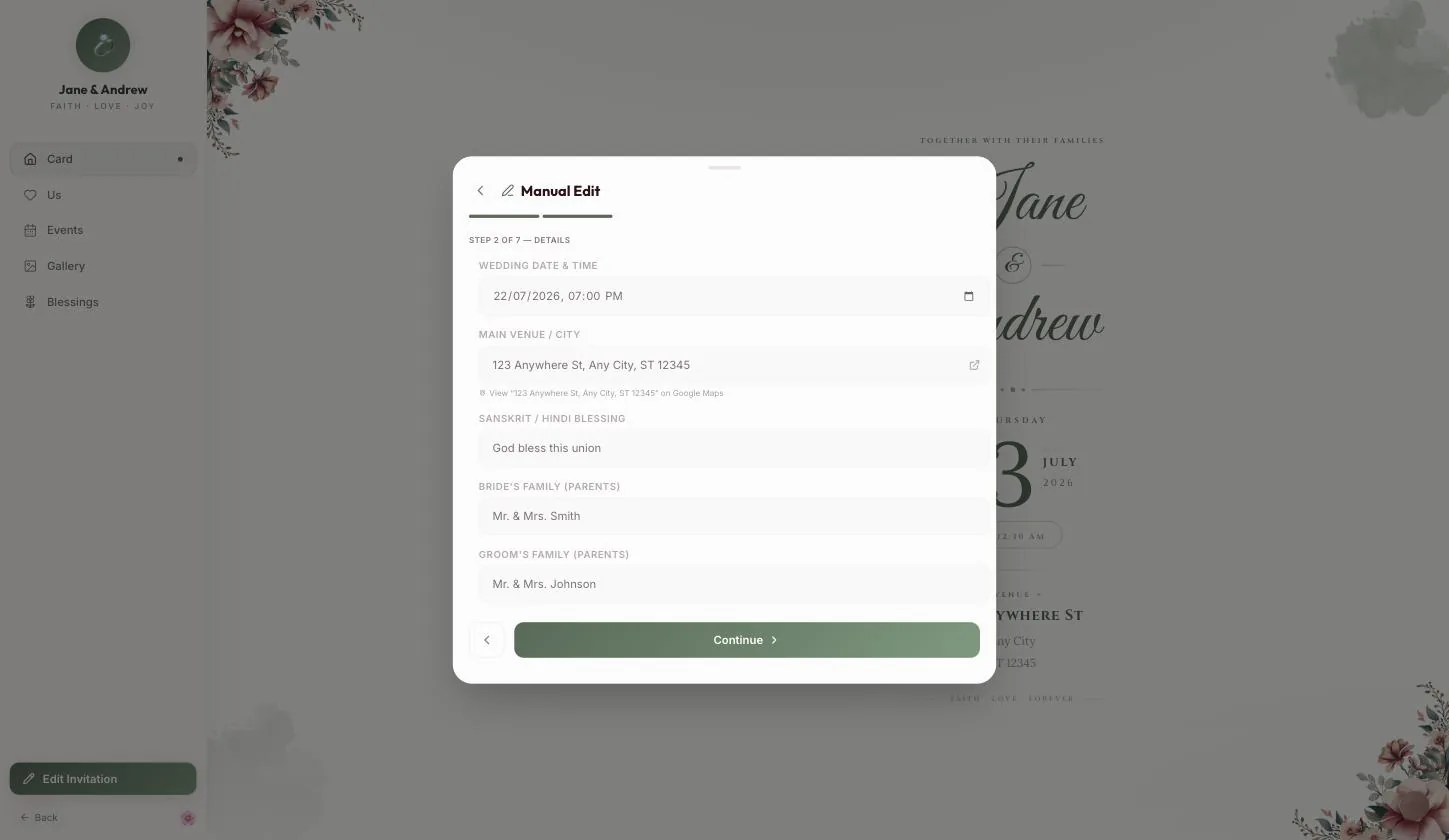
The venue field is doing more than it looks
Type the address and a live “View … on Google Maps” link appears under it. Guests get that link, so write the address the way you would want it typed into a map, not the way it reads on a card.
Step 3.2
The Sanskrit / Hindi blessing
One line, set above the couple's names. The demo uses “God bless this union”; a Sanskrit or Hindi line sits here just as well and the field is named for both.
Step 3.3
Both families, by name
Bride's family and groom's family as they should be read out. These reappear in the Us section.
Step 3 — the functions
Step 4.1
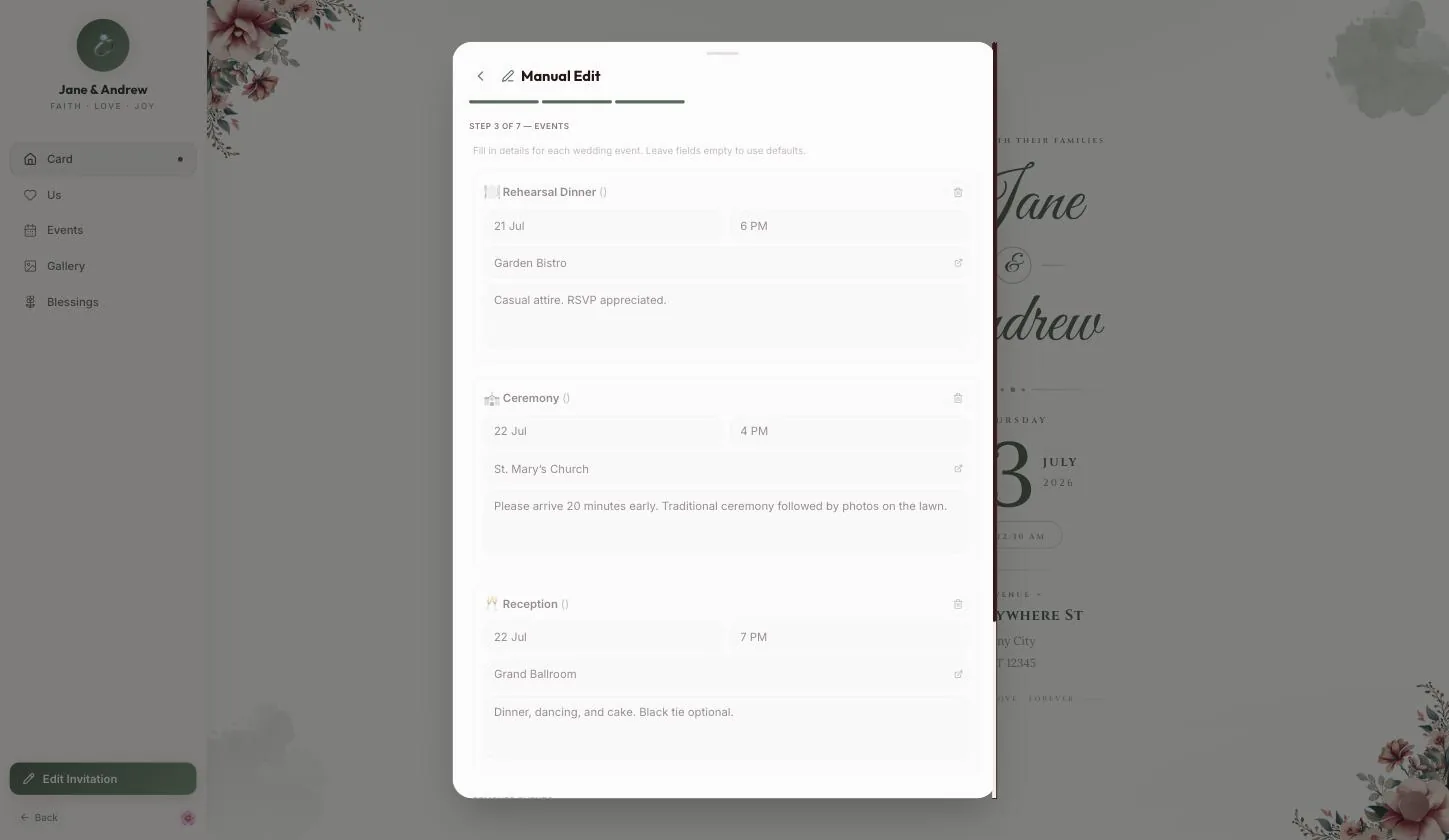
Each event gets a date, a time, a venue and a note
Rehearsal Dinner, Ceremony and Reception to start with. The venue on each event carries its own Maps link, and the note is where the dress code and the “please arrive twenty minutes early” goes.
The line above the list is worth reading: “Leave fields empty to use defaults.” An event you half-fill will show the demo's wording for the rest, so clear what you do not want rather than leaving it.
Step 4.2
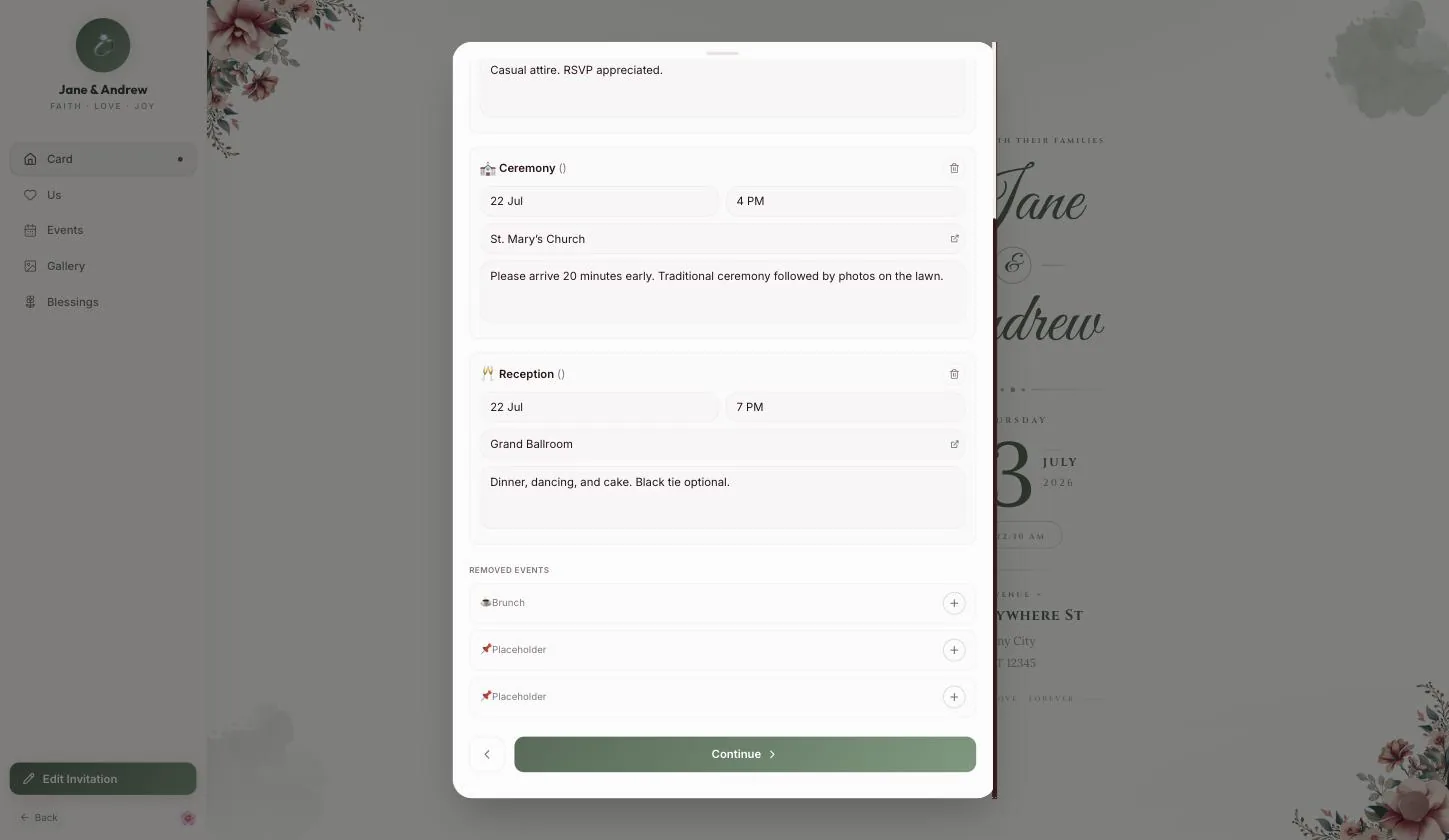
Deleted events are not gone
The bin moves an event into a Removed events tray at the bottom of the page, with a + to put it back. Spare slots live there too, which is how you add a Mehendi or a Brunch.
Step 4 — the gallery
Step 5.1
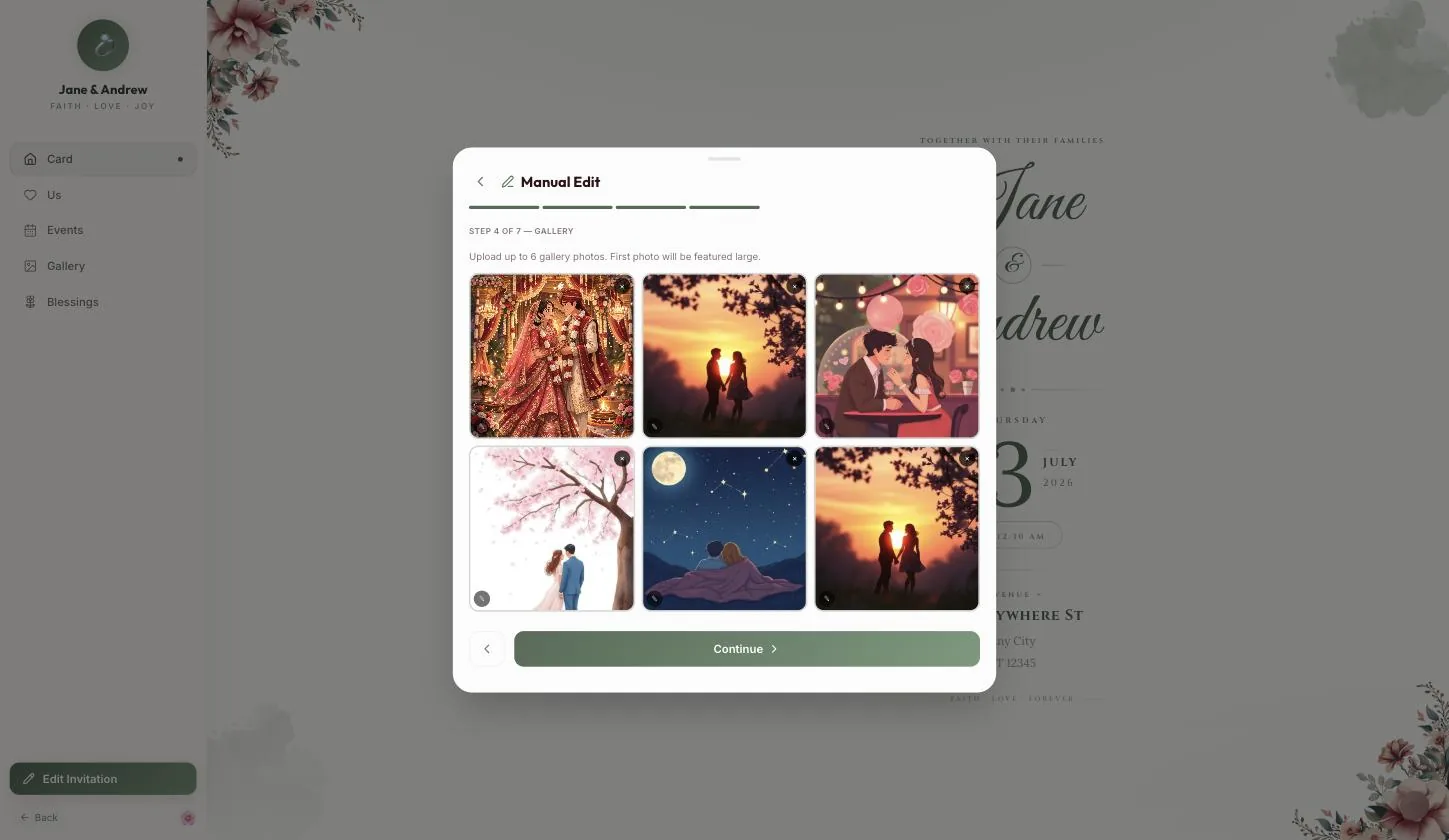
Up to six, and the first one is the big one
The instruction says it: “Upload up to 6 gallery photos. First photo will be featured large.” Pick the one you want at that size first.
Step 5.2
It arrives pre-filled, and you can empty it
Six stock images are already in place. Remove all six and Continue still works — the section simply does not appear for guests. Verified on the live template.
Step 5 — descriptions and family
Step 6.1
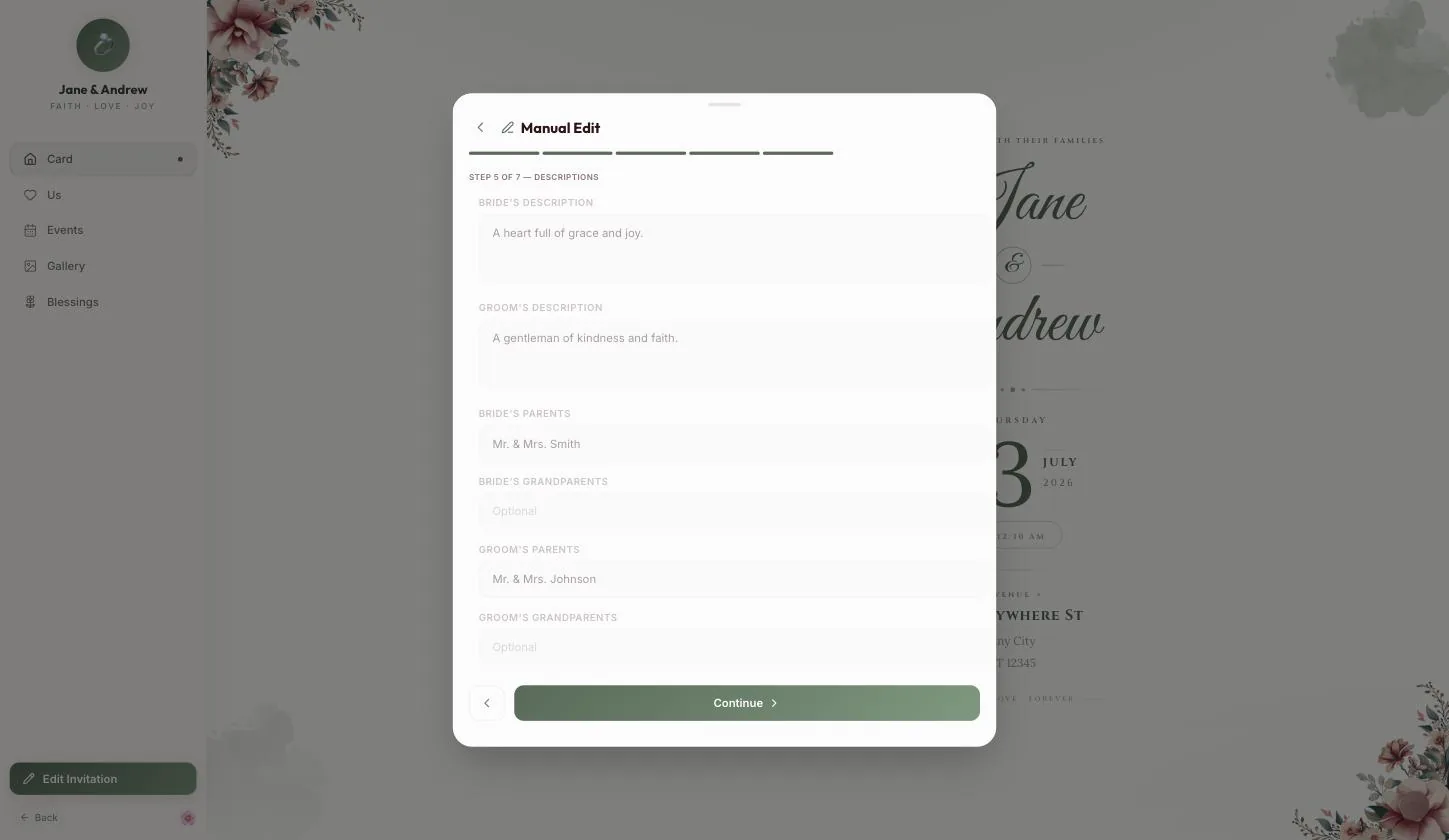
A line each about the two of you
Short. These sit under the names on the Us cards, and they are read in passing rather than studied.
Step 6.2
Grandparents, if they should be named
Both grandparent fields are marked Optional and are easy to scroll past. On an Indian or a traditional Christian card they are often the first names on it.
Step 6 — the share photo
Step 7.1
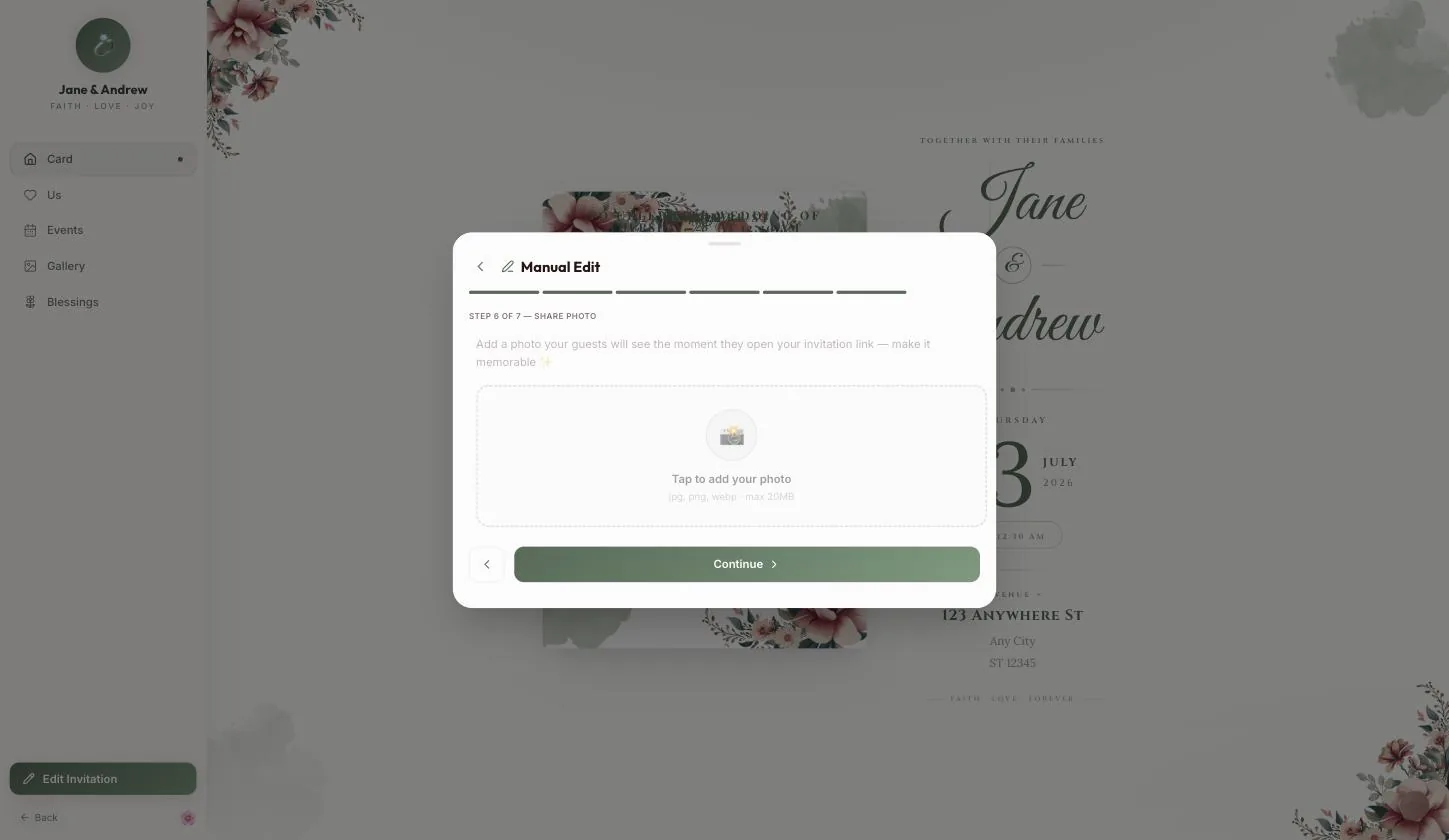
This is the WhatsApp preview
The form says it plainly: “Add a photo your guests will see the moment they open your invitation link.” It is the image that unfurls when the link is pasted into a chat, so it is the first thing most guests ever see. jpg, png or webp, up to 20MB.
Skip this and the link goes out as a bare grey card. It is the single highest-leverage upload in the whole build and it is on the second-to-last page, where most people are already hurrying.
Step 7 — password, then Set & Preview
Step 8.1
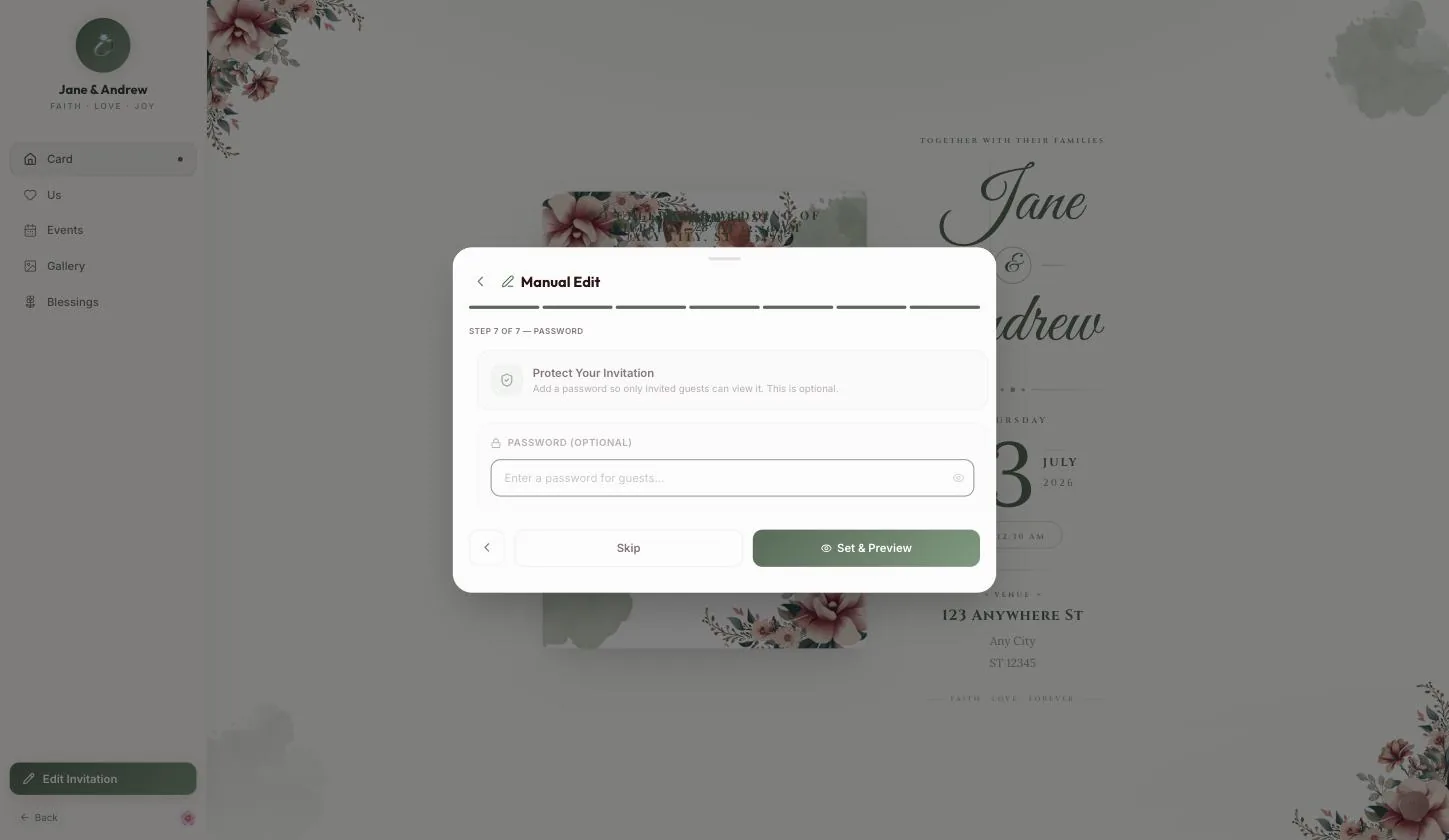
A guest password, or Skip
“Add a password so only invited guests can view it. This is optional.” Skip sits beside Set & Preview, so there is no way to get stuck here.
Step 8.2
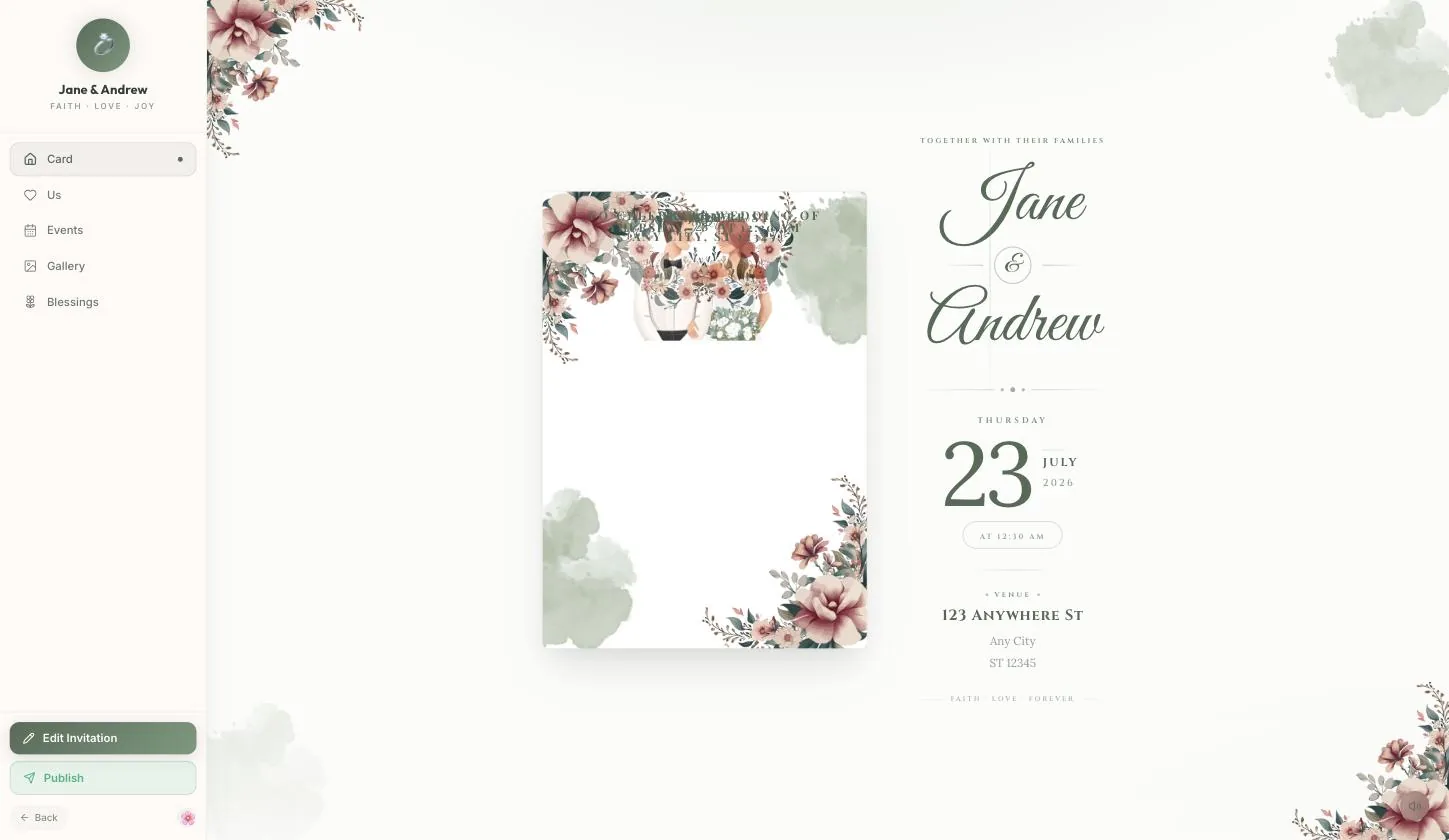
Set & Preview finishes the wizard
The sheet closes onto your finished invitation, and Publish appears in the rail under Edit Invitation.
What the guest sees
Five sections down the left: Card, Us, Events, Gallery, Blessings. Walk them before you send — a step you skipped is simply an absent section.
Step 9.1
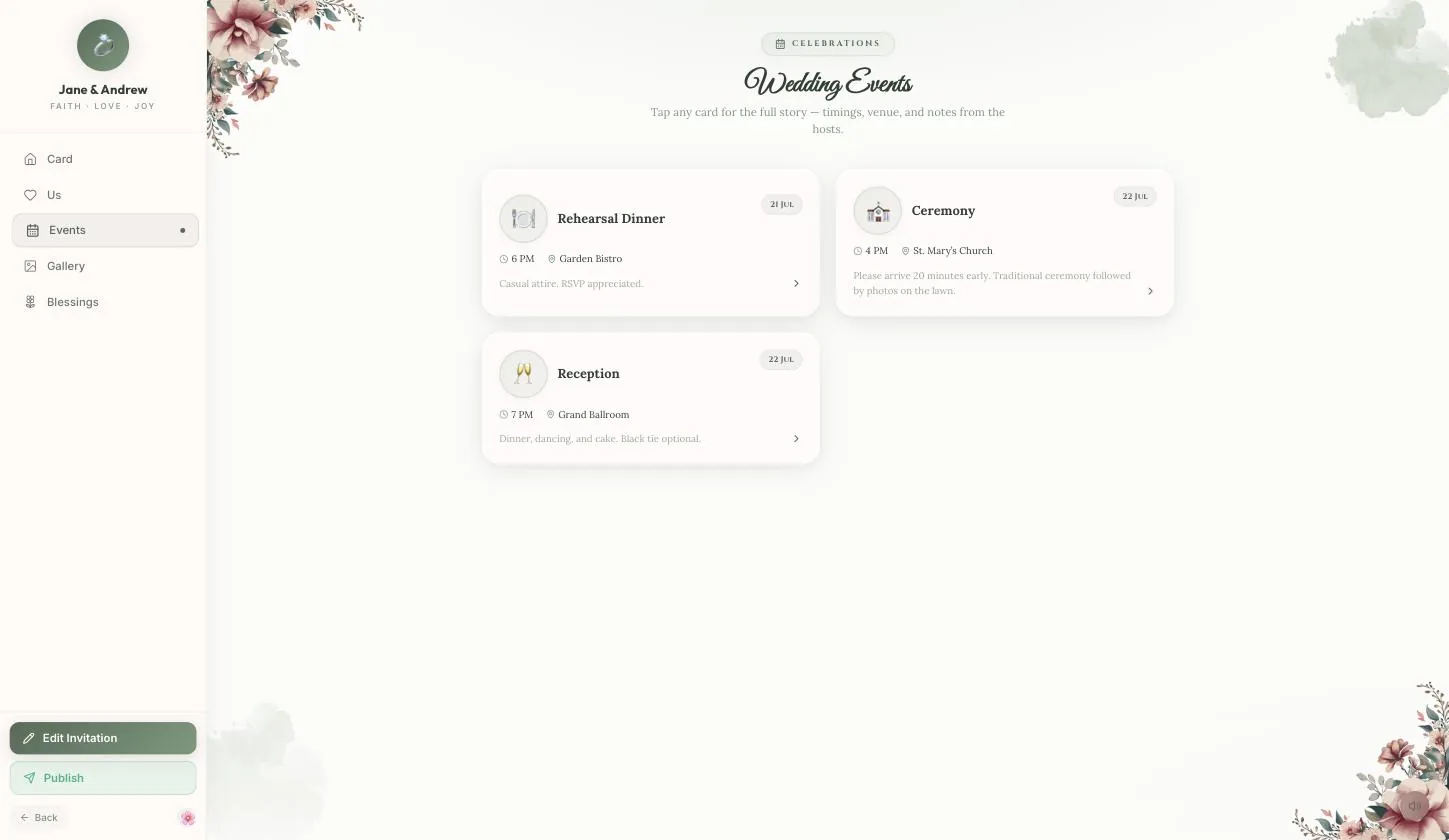
Events, one card per function
“Tap any card for the full story — timings, venue, and notes from the hosts.” The date chip is on the right of each card.
Step 9.2
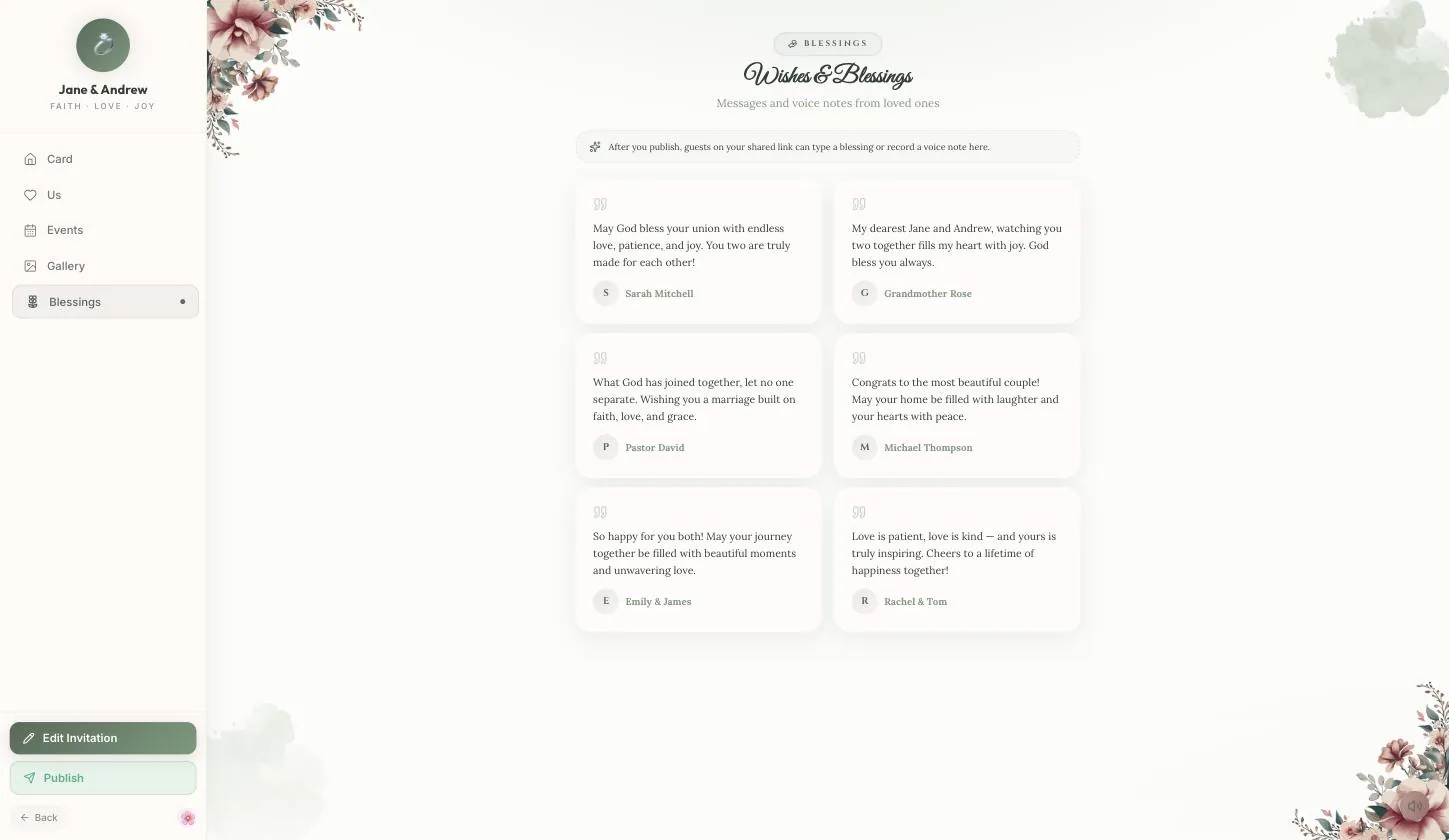
Blessings is a guestbook, and it takes voice notes
The banner says what it is for: “After you publish, guests on your shared link can type a blessing or record a voice note here.” The messages you see before publishing are examples.
This is the part of the template worth telling guests about when you send the link. Nobody leaves a blessing on a page they thought was just a card.
Publish
Step 10.1
Publish goes live immediately
On this template Publish does not ask you to sign in first — the invitation goes live at that click and the rail button becomes Share. Verified on the live site on 28 Aug 2026.
Because it publishes without an account, the link is the only handle you have on the page afterwards. Copy it somewhere safe before you close the tab.
Link, QR, print
Step 11.1
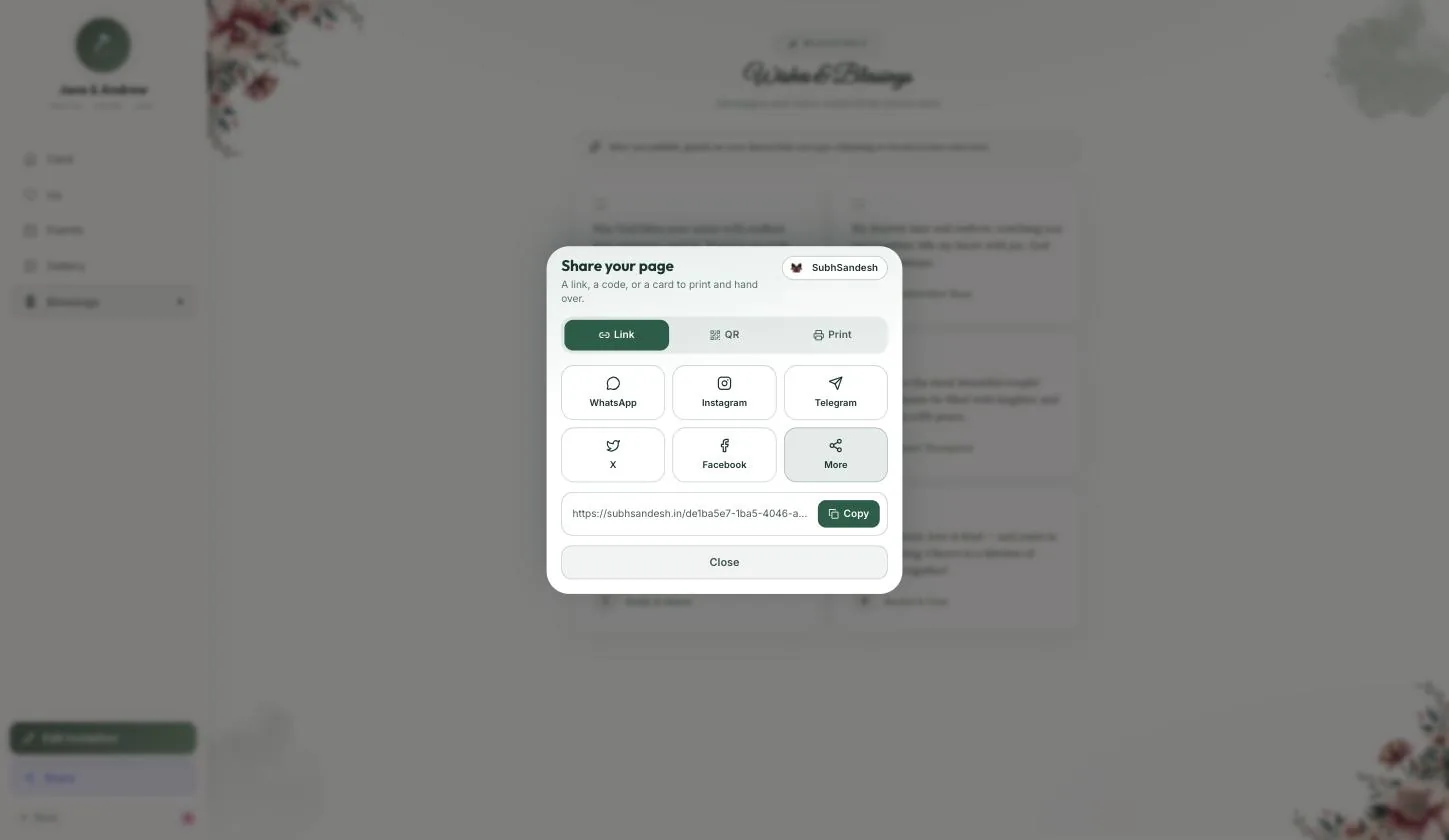
Three ways to hand it over
WhatsApp, Instagram, Telegram, X and Facebook straight from the sheet, or copy the link. QR prints onto the card itself; Print gives you something to slip into an envelope.
Your turn
About 10 minutes, and it is done.
You do not need an account to start — you are asked to sign in once, at the moment you publish.
Open Christian WeddingQuestions
What people ask about this one
Can it just read my printed invitation?
Yes, and it is the best thing in the builder. Generate with AI accepts a photograph of your card and fills the whole thing in from it. Check the fields afterwards, then carry on from wherever it got to.
Where are the Next buttons?
The forward button on all four wedding templates says Continue, and the door is Edit Invitation at the foot of the rail rather than Create in a top bar. Seven pages, then Set & Preview.
Can guests write back?
Yes. The Blessings section is a guestbook that accepts typed messages and recorded voice notes, and it starts collecting once the page is published. The blessings visible before that are examples.
I deleted an event by mistake.
It is in the Removed events tray at the bottom of the events step, with a plus to put it back. The same tray holds the spare slots you add a Mehendi or a Brunch from.
What is the share photo for?
It is the preview image guests see when the link is pasted into WhatsApp. Skip it and the link arrives as a blank grey card, which is a poor first impression of a wedding.
Do I need an account?
Not on this template — Publish puts the invitation live straight away without a sign-in. That also means the link is your only way back to it, so save it as soon as you have it.
Can I keep it to invited guests only?
Set a password on the last step of the wizard. Guests need the word as well as the link.
Keep going